


How to Fix a Ripped Lace Front Wig Like a Pro?
You're freaking out because your lace front wig tore? Don't worry. You can still wear your beloved wig even if the lace is torn. You can definitely revive it with a few tools and a little perseverance. Actually, using a needle and lace patch is one of the best ways to repair a ripped lace front wig. This easy do-it-yourself fix preserves the natural appearance of your wig while saving you money on replacement.
Here’s a clear, professional, wig-tech–approved guide to fixing a ripped lace front wig—whether the tear is small, medium, or near the hairline. This method preserves the lace, keeps the tear flat, and avoids bulky knots.
How to Fix a Ripped Lace Front Wig Like a Pro
What You’ll Need
-
Transparent lace adhesive (Ghost Bond, Bold Hold, OR waterproof clear fabric glue)
-
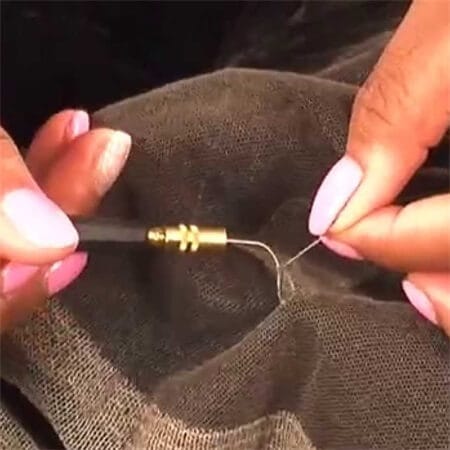
Sewing kit (needle + nylon/thread matching lace)
-
Small patch of spare lace (optional but best for medium/large tears)
-
T-pins
-
Wig head / mannequin head
-
Alcohol (70–91%) & cotton pad
-
Fine-tooth comb or rat-tail comb
Step-by-Step Repair Method (Beginner-Friendly + Pro Results)
Step 1: Clean the Area
Clean the torn lace with a cotton pad dipped in alcohol.
This removes old glue, oils, and dirt so your repair stays strong.
Step 2: Pin the Wig Into Place
Put the wig on a mannequin head and stretch it naturally.
Use T-pins to keep the tear flat and aligned.
Pro Tip:
Make sure the hairs near the tear are brushed out of the way.
Step 3: Decide Your Repair Method
Small Tear (0.5–1 cm): Glue Only
-
Apply a thin layer of clear lace glue to both sides.
-
Press together with a rat-tail comb tip.
-
Let dry completely (5–10 min).
-
Add a second thin layer on the underside for reinforcement.
Medium Tear (1–2.5 cm): Stitch + Glue
-
Use tiny invisible stitches (overcast stitch or loop stitch).
-
Keep stitches very small so they don’t pucker the lace.
-
Add a thin coat of clear glue on the underside.
Large Tear (2.5 cm+): Patch Method
-
Cut a small lace patch slightly bigger than the tear.
-
Place it underneath the damaged area.
-
Stitch lightly around the tear, securing it to the patch.
-
Add thin glue underneath to lay the patch flat.
Step 4: Dry Completely
Let the glue dry fully before touching.This avoids bumps and reduces lifting.
Step 5: Blend the Repair
To hide the repair:
-
Add a bit of concealer or lace tint
-
Pluck lightly around the area if needed
-
Lay baby hairs strategically (optional)
Extra Pro Tips
🔸 Use nylon or invisible thread
Cotton thread absorbs moisture and weakens fast.
🔸 Always stitch with the lace ON a wig head
Free-hand stitching causes uneven tension.
🔸 Avoid over-tightening
If the lace puckers, the repair will show.
🔸 Add a lace patch PREVENTATIVELY
If you wear your wig daily, reinforce the tabs before they rip.
Final Thoughts
Fixing a ripped lace front wig with a needle and lace patch might sound tricky, but once you get the hang of it, it's surprisingly easy. It's a small effort that can make your wig look brand new again—and save you from spending extra cash. Take your time, follow the steps, and your lace front will be ready to slay again in no time.
Leave a comment